Campaign Manager - Campaign Manager (Silverlight)
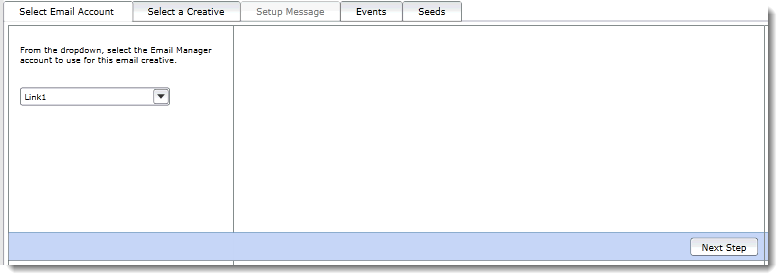

Send a Message

Use Send a Message to send email messages to campaign recipients via an integration with the Alterian Email Manager product. This creative type is only displayed as an option if you have an Email Manager account integrated.

Procedure

  1. Click the drop-down arrow in the Select Email Account tab to select your Email Manager account. Select the relevant account.

Note:

Only the Email Manager accounts that you have been given access to will appear in this list. This account can be changed at any point prior to the campaign starting, however once the account is changed the other tabs will be re-populated based on the new account selected, and the data entered within the Setup message tab will be lost.

  1. Click the Next Step button to configure the message.
  2. On the Select a Creative tab, select the folder that contains the creative you want to use. Select the creative on the right side and then in the area below, select the Email Content(s) you want to use.
Note:

Known issue - if an HTML-only creative that is used in a campaign is later changed to become a multipart creative (both HTML and Text), the change is not recognised in the campaign. In order for the campaign to recognise the newly added Text part, you must either create a new campaign or reselect the creative by selecting another creative and then selecting the original creative.

If a new creative is required click Launch Creative Builder. This takes you to Creative Builder. When your creative is complete, select Campaign Manager to return to the campaign.

  1. The Upload Cells button allows you to upload Cells used on the Campaign to a Look-Up table within Email Manager. Note that at least one Variable must be present on the Campaign for the upload to work. For this purpose both global and local variables with either free text choice lists or database columns are supported. The Look-Up table name created in Email Manager is the Campaign ID followed by the date and time the Look-Up table was created.
  2. Click the Next Step button or click onto the Setup Message tab to access a screen where you set the deployment options and map the message variables.
  3. Expand the Message Deployment Options node to edit the following:
    • Deployment Throttle : Use this option to limit the number of messages that are sent per hour. This is particularly useful where you are mailing a large number of recipients and you want to stagger the mailing to limit impact on system resources. Select the Limit Deployment Speed check box and then enter the maximum Messages per Hour in the field below.
    • Health Threshold : Email Manager automatically maintains a health rating for all mailed recipients. The health of a recipient relates to their history of bounces and message opens. Opens get positive values, while bounces get negative values. Even valid email addresses bounce once in a while (Mailbox Full, or SPAM bounces for example) so it is not good business practice to simply suppress recipients that have bounced in the past. The Health Threshold option allows you to set a minimum value below which recipients will be automatically suppressed, even though they may qualify according to Track criteria.
  4. Under Setup Variables, use the drop-downs and fields to supply values for the variables that are included in the selected template. These could be database columns like ' Email Address ' or ' Title '; fixed values like ' Sender Alias ' or dynamic variables like 'Offer Code'. Campaign validation will fail unless you supply valid values for all message variables.
    Note:

    Email Manager does not have a concept of ' Campaign Variables ' - all variables in Email Manager are stored at recipient level. When inserting campaign variables into email creatives, be aware that this will update that variable for all the recipients in the campaign, and that the variable may be updated by a subsequent campaign. The potential result of this behavior is that your campaign creative may display a variable value that is not valid for that campaign.

  5. Click Save from the Ribbon bar when you have finished configuring the message.

Results

The messages will not be sent until the tactic has been added to a track, the campaign has passed validation, and the campaign has been started.

When a 'Send a Message' tactic is added to a track, all recipients in that track will be available to receive the message, depending on their variable status and other campaign logic. No messages will be sent until the campaign has been started

What to do next

Use the After a Period tool to delay a Send a Message tactic.

  Online & Instructor-Led Courses | Training Videos | Webinar Recordings
© Alterian. All Rights Reserved. | Privacy Policy | Legal Notice